 FRAMSTEG
Vattentankpaneler i rostfritt stål: Kvalitet, Tjocklek och montering
Vattentankpaneler i rostfritt stål: Kvalitet, Tjocklek och montering
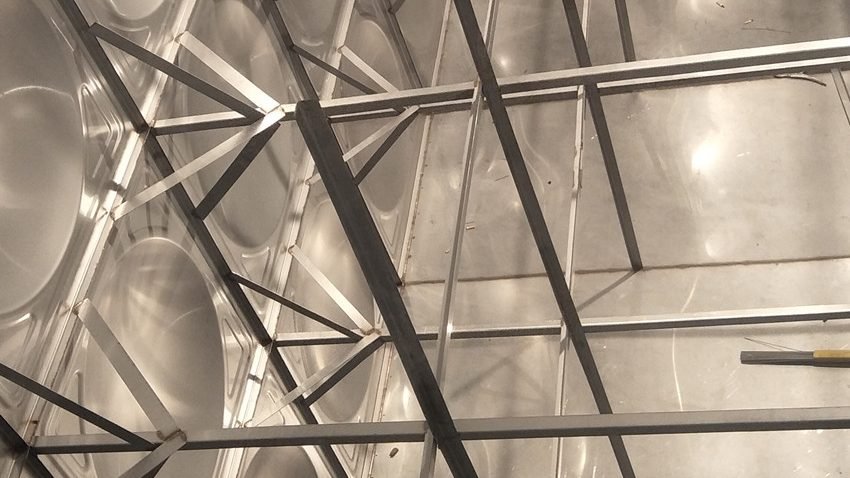
Stainless steel water tanks are assembled from prefabricated panels on site, bolted or welded together over a steel or concrete base. They are used for potable water, fire reserve, process water, grey water and, in some cases, for food and pharmaceutical liquids. The panel is the primary structural and barrier element, and its grade, thickness and forming determine both the tank’s life and its water quality.
Most tank failures are not dramatic collapses. They are pitting corrosion at a weld, crevice corrosion under a gasket, deformation of a panel between stiffeners, or water that fails a bacteriological test because the tank was never cleaned properly. All of these are specification issues, and all of them can be designed out.
Grade Selection: 304, 316L and the Chloride Question
304 stainless is the standard choice for potable water in most municipal supplies. It contains 18 percent chromium and 8 till 10.5 percent nickel, and it forms a passive oxide layer that protects the surface. In water with chloride content below about 200 mg/L and at moderate temperature, 304 performs well for decades.
316tillägger L 2 till 3 percent molybdenum, which raises the pitting resistance substantially. It is the correct grade for coastal locations, for water with chloride above 200 mg/L, for hot water above 60 °C, and for tanks that will be chlorinated heavily. De “L” designation means low carbon, which prevents sensitisation and intergranular corrosion in the heat-affected zone of welds.
A common and costly error is to build the tank in 304 and then discover that the site water is chlorinated to 1 mg/L free chlorine with a chloride level of 400 mg/L. Under those conditions 304 will pit within a few years, usually at the welds and at the waterline. Test the water before selecting the grade, not after.
| Kvalitet | Chloride limit | Typical application |
|---|---|---|
| 304 | < 200 mg/L | Municipal potable water, inomhus- |
| 316L | < 1000 mg/L | Kust, brackish, hot water |
| 444 | < 2000 mg/L | High-chloride, ferritic alternative |
| 2205 duplex | Hög | Seawater, aggressive industrial |
The table is indicative, not a design authority. Pitting resistance depends on temperature, chloride level, dissolved oxygen and stagnation. A tank that stores water at 70 °C with 300 mg/L chloride needs a higher grade than the table suggests.
Panel Thickness and Stiffener Design
Panel thickness for water tanks typically ranges from 1.5 mm for small tanks up to 4.0 mm for large, tall tanks. The governing load is hydrostatic pressure, which increases linearly with depth: a 4-metre water column produces about 39 kPa at the base.
The panel does not resist that pressure alone. It spans between vertical and horizontal stiffeners, and the rib pattern in the panel increases its out-of-plane stiffness. The design check is deflection at the panel centre, usually limited to a fraction of the panel span, plus stress at the bolts and at the stiffener connections.
A practical rule used by tank fabricators is that panel thickness increases with depth in steps: 1.5 mm at the top ring, 2.0 mm in the middle, 2.5 till 3.0 mm at the base. A tank built entirely from 1.5 mm panels to save cost will deform visibly at the base when full, and the deformation opens the joints.
| Tank height | Top ring | Middle ring | Base ring |
|---|---|---|---|
| Fram till 2 m | 1.5 mm | 1.5 mm | 2.0 mm |
| 2 – 3 m | 1.5 mm | 2.0 mm | 2.5 mm |
| 3 – 4 m | 2.0 mm | 2.5 mm | 3.0 mm |
| 4 – 5 m | 2.0 mm | 3.0 mm | 3.0 – 4.0 mm |
Bolted vs Welded Assembly
Bolted panels are assembled with gaskets between panel flanges and are the standard for field-erected tanks where welding is impractical or where the tank may need to be relocated. The gasket material must be food-grade for potable water — EPDM or silicone, never a nitrile or neoprene that can leach.
Welded panels are assembled on site by TIG welding, usually with a backing gas to protect the root. Welded tanks are more rigid and have no gasket to degrade, but the welding must be done by qualified welders, and the weld must be passivated afterwards to restore the passive layer.
Either way, the joint is the weak point. In a bolted tank, the gasket compresses over time and the bolts lose preload; a re-torque schedule is part of maintenance. In a welded tank, the heat-affected zone is where pitting starts if the weld was not properly shielded or pickled.
Surface Finish and Cleanability
Potable water tanks should have a smooth, pit-free surface. A 2B finish is adequate for most municipal work. A pickled and passivated finish is better for tanks that will be cleaned with chemicals. A mirror finish is not necessary and adds cost without improving hygiene.
The critical issue is weld treatment. Welding leaves heat tint — a thin oxide film that is chromium-depleted underneath and is the initiation site for pitting. Heat tint must be removed by pickling paste, by electrochemical cleaning, or by mechanical grinding followed by passivation. Simply wire-brushing the weld is not sufficient; it removes the visible colour but leaves the depleted layer.
After erection, the tank must be cleaned and disinfected before commissioning. The standard procedure is to fill, chlorinate to 50 mg/L free chlorine, hold for 24 timmar, drain, and refill. Skipping this step is the usual reason a new tank fails its first bacteriological test.
Bas, Foundation and Loads
A water tank is heavy when full. A 3-metre cube holds 27 tonnes of water, and the tank plus structure adds several more tonnes. The base must be designed for that load, and it must be flat within a tight tolerance; a base that is 10 mm out of level over 3 metres will distort the bottom panel and open the joints.
Typical bases are a reinforced concrete slab with an embedded steel frame, or a steel skid for smaller tanks. The tank should sit on a bedding layer or on a steel grating that allows inspection of the underside. A tank sitting directly on a slab traps moisture under the base plate and corrodes from below.
For outdoor tanks, wind and seismic loads must be considered, and the tank must be anchored. An empty tank is light and vulnerable to wind uplift; a full tank is heavy and generates large seismic forces. Both cases need to be checked by the structural designer, not assumed.
Insulation, Covers and Accessories
An outdoor tank in a cold climate needs insulation to prevent freezing and to reduce heat loss if the water is heated. Insulation is usually applied to the outside with a cladding, and the cladding must not trap water against the stainless surface. A tank insulated on the outside with a sealed jacket can suffer crevice corrosion under the jacket if condensation forms.
The cover must exclude light to prevent algae growth, and it must be vented to allow air movement as the water level changes. A sealed cover on a tank that is being filled or drained will be loaded by pressure or vacuum and can fail.
Accessories include inlet and outlet flanges, overflow, drain, level indicators, ladders and manways. Every penetration is a potential leak and a potential crevice. Specify flanged connections with proper gaskets rather than threaded fittings welded directly to the panel.
Inspection and Testing
Before dispatch, panels should be checked for thickness, flathet, rib depth and finish. The weld quality on any prefabricated sections should be verified visually and, for critical tanks, by dye penetrant or vacuum box testing.
On site, after assembly, the tank should be filled and held for 24 hours and inspected for leaks at every joint. A hydrostatic test at the design water level is the definitive check. For potable tanks, a water sample should be taken after disinfection and tested for bacteriological quality before handover.
Documentation should include material certificates with heat numbers, weld procedure and welder qualification records, pickling and passivation records, and the disinfection record. Without these, a tank that looks fine may still fail a health inspection.
Sizing the Tank and Layout of Nozzles
Tank sizing starts from the demand profile, not from a round number. For a potable water tank, the required volume is usually the daily demand multiplied by a storage period, plus fire reserve if the tank serves a fire system, plus a dead volume that cannot be drawn because the outlet sits above the floor.
For a fire reserve tank, the volume is defined by the fire code: the required flow multiplied by the required duration, often 1 till 3 hours depending on occupancy and hazard. That volume cannot be shared with the domestic reserve, and it must be protected against being drawn down by normal use. The usual solution is a dedicated fire tank or a tank with a fire reserve outlet arranged so that the domestic draw-off stops at the reserve level.
Nozzle layout is where most tank problems originate. The inlet should discharge above the water surface or through an air gap, not submerged, to prevent backflow. The outlet should sit at least 50 mm above the floor and draw through a strainer, so that sediment is not drawn into the supply. The drain should be at the lowest point and should be sized to empty the tank in a reasonable time. The overflow should be visible, sized for the maximum inflow, and should discharge where the water can be seen.
Every nozzle is a structural penetration in a thin panel, and it must be reinforced. A 100 mm flange welded directly into a 2 mm panel creates a stress concentration and a crevice. The correct detail is a reinforcing pad or a short spool welded to the panel, with the flange welded to the spool. The pad spreads the load and moves the weld away from the panel surface.
Nozzle spacing matters for water quality. A tank with a single inlet and a single outlet can develop stagnant zones, particularly in a large tank with a small through-flow. The design should promote turnover: inlet and outlet positioned to create a flow path through the whole volume, or a recirculation arrangement for tanks with low demand.
Water Quality, Stagnation and Legionella Risk
Stainless steel does not sterilise water. A clean tank in stainless steel can still grow biofilm if the water is warm and stagnant. The risks are highest in tanks that store domestic hot water, in tanks with low turnover, and in tanks where the cover admits light.
The control measures are temperature, turnover and cleanliness. Cold water should be kept below 20 °C; hot water should be stored above 60 °C and distributed above 50 °C. A tank that sits between 20 och 45 °C for long periods is the ideal environment for Legionella growth, and insulation that keeps the water warm without heating it above 60 °C makes the problem worse rather than better.
Turnover should be designed so that the whole volume is exchanged within a defined period, typiskt 24 till 48 hours for potable water. A tank sized for a week of storage with a small daily draw is a stagnation risk. If the demand is low, a smaller tank with a recirculation loop is a better design than a large tank with a long residence time.
Inspection access matters for cleaning. A tank that cannot be entered and cleaned will accumulate sediment and biofilm, and the water quality will degrade regardless of the tank material. A manway of at least 500 mm, with a ladder and a vented cover, is the minimum for a tank large enough to require internal cleaning.
Slutligen, the tank must be commissioned properly. The disinfection procedure — fill, chlorinate, hold, drain, refill — is not optional, and the result should be verified by a water sample. A tank that passes a visual inspection but fails a bacteriological test is not a completed installation.
Vanliga frågor
Is 304 safe for drinking water? Ja, in most municipal supplies with chloride below 200 mg/L. Test the water first, particularly if the supply is from a borehole or is heavily chlorinated.
Why does my tank pit at the waterline? Because that zone alternates between wet and dry, which concentrates chlorides and destroys the passive film. A higher grade or a protective coating at the waterline is the remedy.
Can I weld the tank on site? Ja, with qualified welders, proper shielding gas and post-weld pickling. Field welding without shielding produces a weld root that pits within months.
How thick should the bottom panel be? It depends on the base and the tank height; typically one step thicker than the base ring wall panel. A bottom panel that deflects will crack at the corner weld.
Do I need to insulate the tank? If it is outdoors in a freezing climate, or if the water is heated and heat loss matters. Insulation must be detailed so that it does not trap moisture against the stainless steel.
View 316L stainless plate specifications eller View 304 2B ark