 PROGRÈS
Gouttière de pluie en acier inoxydable: Profil, Jauge, Guide de dimensionnement et d'installation
A stainless steel rain gutter is not a decorative trim. It is a hydraulic component with a structural duty, and it fails in three predictable ways: it is undersized for the roof area it drains, it is supported too sparsely for the snow and wind load it sees, or it is detailed so that thermal movement tears the joints apart. Stainless steel solves the corrosion problem that galvanised and painted steel gutters face, but it does not solve a sizing or fixing problem. This guide covers the profiles used in industrial and architectural work, the gauge and grade selection, the development width calculation that converts a profile into a strip width, the flow capacity and bracket spacing rules, the expansion detailing, and the installation sequence that keeps water inside the gutter instead of behind it.
Where Stainless Gutters Are Used
Stainless steel gutter is specified where the building cannot tolerate staining, frequent repainting or leakage: food and beverage plants, pharmaceutical buildings, hospitals, airports, coastal and marine structures, waste water treatment buildings, and architectural projects where the visible roof line is part of the design. It is also used on industrial sheds where condensate and process runoff are acidic or chloride-bearing, and on cold-climate buildings where a painted steel gutter would be damaged by ice.
The material has two practical advantages over galvanised steel. D'abord, the passive chromium oxide film repairs itself, so cut edges and small scratches do not become rust points. Deuxième, stainless steel keeps its appearance without repainting, which matters where access for maintenance is difficult or expensive. The disadvantage is cost and the need for proper stainless fabrication practice; a gutter made from stainless steel with carbon steel fixings and carbon steel drill swarf left in the channel will rust, and the rust will be attributed to the wrong cause.
Profiles and Development Width
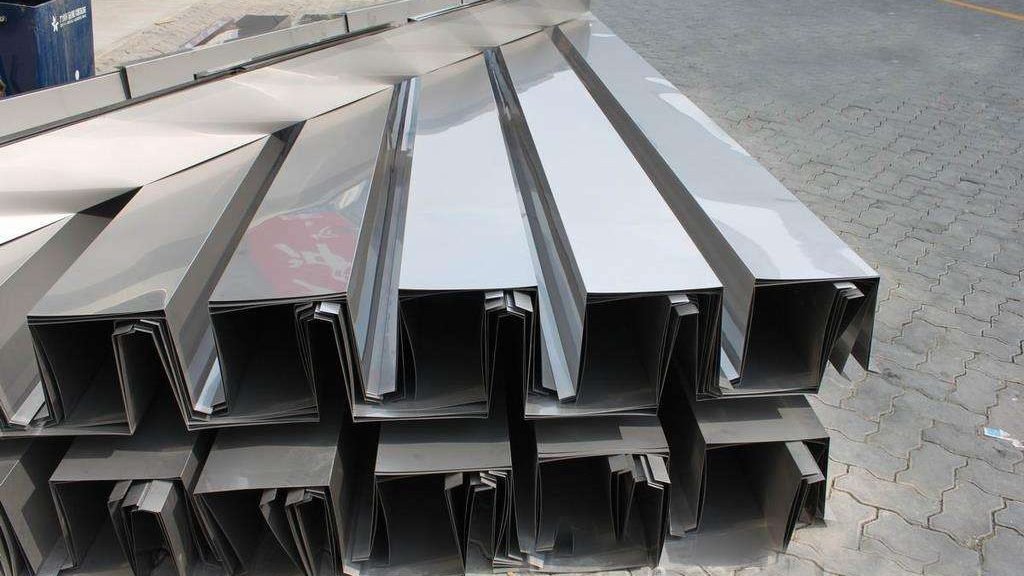
Four profiles cover most work. The half-round profile is the classic architectural shape, efficient for its width and easy to form continuously. The box or square profile has a flat bottom and vertical sides, which gives a clean line and predictable capacity. The K-style or ogee profile has a decorative front face and a narrower channel, common in residential work. The custom folded profile is drawn to suit a specific building, often with a tapered section, a hidden fixing flange or an integral upstand.
Every profile is ordered by development width, not by the visible width. Development width is the flat strip length needed to produce the section, including the bottom, les deux côtés, the rear upstand and any return folds. A box gutter that measures 300 mm across the top and 250 mm deep may need 700 à 800 mm of strip once the sides, upstands and folds are counted. If the buyer orders by “300 mm gutter”, the supplier has to guess, and the guess is usually wrong.
The calculation is straightforward. For a simple rectangular channel with a bottom width B, two side heights H, two rear upstands U and two fold allowances F, development width equals B plus 2H plus 2U plus 2F, minus any material saved by corner radii. For a half-round profile, development width is approximately half the circumference of the outer arc plus the upstand and the fold allowances. Suppliers normally provide a development drawing for each profile; the drawing should be approved before the coil is slit.
| Profil | Typical opening, mm | Jauge, mm | Development width guide | Utilisation typique |
|---|---|---|---|---|
| Half round | 100–200 | 0.5–0.8 | 1.9 × opening + 60 | Architectural roofs, facades |
| Box | 150–500 | 0.6–1.2 | opening + 2 × depth + 120 | Industrial roofs, auvents |
| K-style / ogee | 100–150 | 0.4–0.6 | 2.2 × opening + 50 | Residential, light commercial |
| Custom folded | Per drawing | 0.8–1.5 | Per developed section | Airports, plants, feature roofs |
Length is another specification item. Continuous forming machines produce gutter in long lengths, limited by transport. UN 12 m length avoids joints and the movement problems that come with them; where transport or site access limits length, joints must be designed with slip or expansion provision rather than butted and sealed with mastic alone.
Grades and Thickness
304 is the default for inland architectural work, food plants and general industrial roofs. 316L is used within about one kilometre of the coast, on marine structures, and where the runoff carries chlorides from de-icing salt or process chemicals. 430 is a lower-cost ferritic option for dry inland areas with a painted or coated finish; it forms well but has limited weldability and lower toughness, so it is not the choice for a gutter that will be welded on site.
Thickness is chosen by span between brackets, by snow load, and by the need to resist handling damage. As a working guide: 0.5 à 0.6 mm suits half-round and K-style gutters with brackets at 600 mm centres and no snow; 0.7 à 0.8 mm suits box gutters on industrial roofs and sites with moderate snow; 1.0 à 1.2 mm suits long spans, heavy snow, or gutters that will be walked on during maintenance. Thin gauge is not a saving if the gutter deflects and holds water, because standing water accelerates fouling and adds permanent load.
The grade and the thickness must be stated together with the finish. A 2B finish is the standard cold rolled bright finish and is adequate for painted or hidden gutters. A No. 4 brushed finish suits visible architectural work and hides handling marks. PVC film protection is normal for visible work, but the film must be removed within the manufacturer’s window, particularly on a roof where sunlight will bake the adhesive.
Sizing and Flow Capacity
Gutter sizing starts from the roof area and the design rainfall intensity, not from the gutter look. The basic relationship is that the gutter must carry the runoff from its tributary roof area at the design intensity, and the outlet must carry the same flow with the gutter running part-full, typically at 50 à 70 percent depth to allow for wind-driven rain and debris.
A practical estimate for a box gutter uses the Manning equation with a hydraulic radius based on the part-full section. For preliminary sizing, un 150 mm box gutter at 1 percent slope will carry on the order of 8 à 12 litres per second when running at two-thirds depth, depending on the surface roughness and the outlet condition. UN 200 mm box gutter roughly doubles that. Half-round gutters carry less for the same opening because the wetted perimeter is larger relative to the area; un 150 mm half-round is typically rated near 5 à 8 litres per second at the same slope.
These figures are for preliminary work only. The final size should be checked against the project rainfall intensity, the roof pitch, the outlet arrangement and the debris load. Where the roof collects leaves, the effective capacity drops by a large margin unless a leaf guard is fitted, and a leaf guard that is poorly maintained is worse than no guard because it blocks and overflows the gutter at the rear.
| Nominal gutter | Tributary roof area, guide | Outlet diameter | Bracket spacing |
|---|---|---|---|
| 100 mm half round | jusqu'à 60 m² | 50–65 mm | 600 mm |
| 150 mm half round | 60–120 m² | 65–80 mm | 600 mm |
| 150 mm box | 120–200 m² | 75–90 mm | 500–600 mm |
| 200 mm box | 200–350 m² | 90–110 mm | 500 mm |
| 300 mm box | 350–700 m² | 110–160 mm | 400–500 mm |
The roof area figures are indicative for a rainfall intensity around 100 mm per hour and a two-thirds-full flow condition with a 1 percent slope. They scale roughly with intensity: doubling the design rainfall halves the area a given gutter can serve. Where the building authority specifies a higher intensity, use that value and recalculate.
Prise en charge, Slope and Movement
Brackets carry the weight of the gutter, the water and any snow. Spacing follows the gutter section and the load: 600 mm for half-round and light box gutters, 500 mm for heavier box sections, et 400 mm where snow load is significant or where the gutter spans between brackets without a continuous fascia. Fixings must be stainless steel of the same family as the gutter, or an isolating washer must break the contact; a galvanised bracket on a stainless gutter creates a galvanic couple and the bracket corrodes.
Slope should be continuous and visible. A minimum of 1 dans 600 is normal for a gutter with smooth stainless surfaces; 1 dans 100 à 1 dans 200 is common on long industrial roofs to overcome construction tolerance and ensure the water reaches the outlet. Do not rely on the roof pitch to drain the gutter; the gutter has its own fall, set by the bracket line.
Thermal movement is the detail that separates a gutter that lasts from one that leaks. Stainless steel expands about 0.03 mm per metre per degree Celsius, so a 12 m gutter experiencing a 50 degree swing moves roughly 18 mm. Joints must either accommodate that movement with a slip joint and sealant, or the gutter must be fixed at one end and allowed to move at the other. Riveting or welding every joint rigidly along a long run produces cracks at the fasteners or tears at the outlet. Expansion joints should be placed at intervals of roughly 8 à 12 m, or per the manufacturer’s recommendation, and at every change of direction.
Fabrication and Jointing
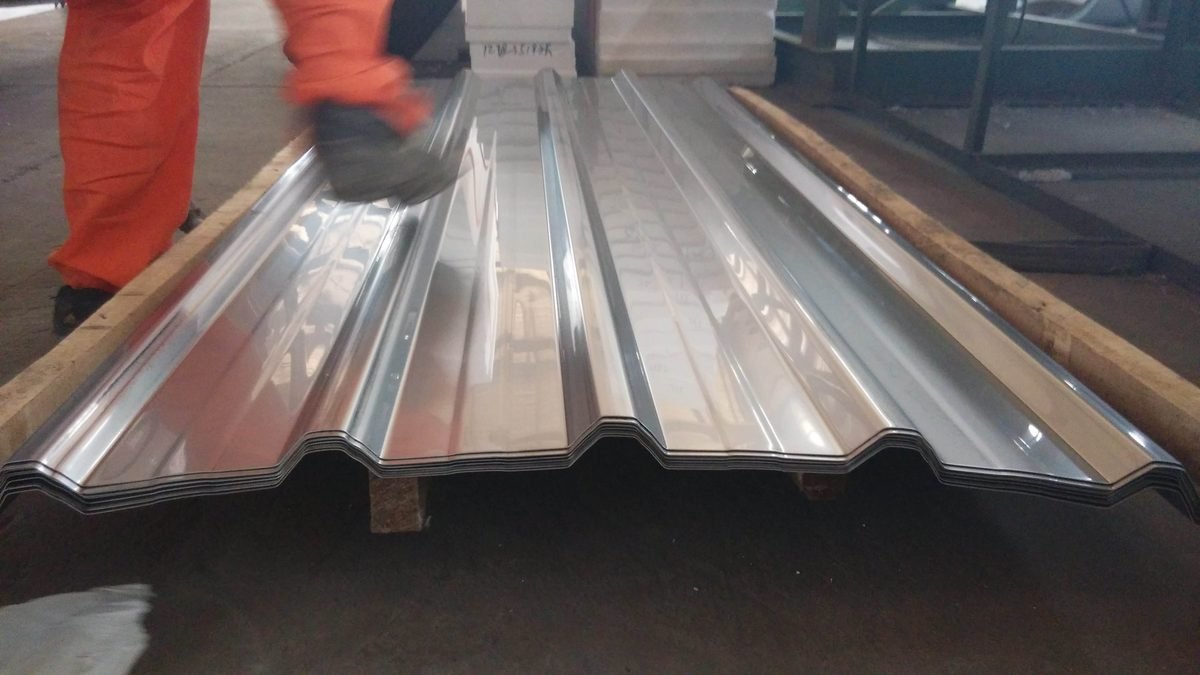
Stainless gutter is formed from coil on a roll former or a folding machine. Corner sections, outlets, end caps and expansion joints are fabricated separately and either welded or sealed. Welding gives the most durable joint, but it must be done with the correct filler (308L for 304, 316L for 316L), with adequate shielding and with the heat tint removed afterwards. A welded joint that is left with heat tint will corrode at the weld line, and the corrosion will run along the seam.
Where welding is impractical on site, the joint should be a mechanical slip joint with a suitable neutral-cure silicone or a purpose-made EPDM seal, supported by a stainless strap or a riveted cleat. Acid-cure silicone should not be used on stainless steel because the acid residue attacks the surface and produces a corrosion line under the seal. Sealant alone, without a mechanical fixing, will fail under thermal movement.
Cut edges should be deburred and, where the gutter is visible, dressed. Grinding dust from carbon steel work must not be allowed to settle on the stainless gutter; it embeds in the surface and produces rust spots that look like base-metal corrosion. If carbon steel work is happening nearby, cover the gutter or clean it thoroughly at the end of each shift.
Installation Sequence
Set out the bracket line first, with the fall checked using a laser or a string line, and mark the outlet positions. Fix the brackets to a continuous fascia or to structural purlins, not to the roof sheeting. Offer up the first length, check the fall, then fix progressively towards the outlet. Fit the outlet and the end cap before the run is completed, because it is easier to seal them on the ground than on the roof.
At every joint, leave the expansion provision and fit the seal. At changes of direction, use a factory-formed corner rather than a site-cut miter, because a site miter in stainless is difficult to seal and always visible. After the run is complete, flood test the gutter with a hose at the far end and check for leaks at joints, outlets and end caps before the roof flashing is closed.
Enfin, check the interface with the roof membrane or the sheet flashing. Water must not be able to bypass the gutter at the rear. An upstand that is too low, or a flashing that stops above the gutter lip, will allow wind-driven rain to run behind the gutter and down the fascia, which is often mistaken for a gutter leak.
Cold Climate, Coastal and Industrial Service
In snow areas, the gutter must be sized for the snow load and supported more closely, and ice dams must be prevented by ventilation and insulation rather than by adding heat cable to a gutter that cannot drain. A gutter full of ice can pull brackets out of a light fascia; the brackets, not the gutter, are usually the weak link.
On the coast, 316L is the minimum, and the fixing system must also be 316L. Salt deposits should be washed off annually; a gutter that never receives rain will accumulate salt and stain. In industrial areas, the runoff chemistry should be checked before the grade is chosen, because acidic condensate from certain processes will attack 304 even though the atmosphere is benign.
Erreurs courantes
Ordering by visible width instead of development width, which produces a section that does not fit the brackets. Undersizing a box gutter because the roof area was estimated from the plan rather than measured. Fixing brackets to the sheet sheeting instead of the structure. Using galvanised brackets and carbon steel screws on a stainless gutter. Sealing a long joint with mastic and no mechanical fixing. Omitting expansion joints on a 12 m run. Leaving weld heat tint in place. Allowing grinding dust to settle on the surface. Fitting a leaf guard and never cleaning it.
Foire aux questions
Which grade should I use near the sea? 316L for the gutter and 316L for the brackets and fasteners. 304 will stain within a season in a salt-spray zone, particularly on the underside where rain does not wash the surface.
How thick should a stainless gutter be? 0.6 à 0.8 mm for most architectural and light industrial work, 1.0 à 1.2 mm for long spans, snow load or maintenance access. Thickness is set by support spacing and load, not by appearance.
Can stainless gutter be welded on site? Oui, with TIG and the correct filler, but site welding requires shielding, cleaning and heat tint removal. Many projects use factory-welded corners and mechanical slip joints on site to avoid the risk.
Why does my gutter leak at the joints? Usually because the joint was sealed rigidly and thermal movement pulled the seal apart. Fit an expansion joint or a slip joint with a mechanical strap, and leave the movement allowance.
Does a stainless gutter need painting? Non. Painting is a colour choice, not a protection requirement. If it is painted, the surface must be properly prepared and a system suitable for stainless steel used, otherwise the coating will detach.
Order checklist: profile drawing with development width, grade and finish, gauge, total length and joint positions, bracket type and spacing, outlet and end cap details, expansion provision, and the fixing material. The hydraulic check belongs in the same document.
A stainless gutter is a long-life component only when the sizing, the support and the movement detailing are right. The material removes the corrosion problem; it does not remove the engineering. Get the development width, the bracket spacing and the expansion joints correct and the gutter will outlast the roof it serves.
Related material: 304 Tôle d'acier inoxydable for gutter fabrication, 304 bobine en acier inoxydable for continuous forming, et DX51D galvanized strip where a painted gutter system is acceptable.